SQL Server Database Source Code control with DBSourceTools 2
November 3, 2014 Leave a comment
Scripting Existing databases
This is the second blog on using DBSourceTools to help source control SQL Server databases. You can find the first part here, where we discussed the benefits of source controlling databases, and went through a step-by-step process of starting up a new project, deploying a target database, and then including patch scripts as part of this deployment process.
This blog post is geared towards working with existing databases, and is a guide for projects where a database is already in place, or where you would like to use a TEST instance of your database as your source snapshot.
For this tutorial, we will use the AdventureWorks sample database from Microsoft. You can download a version of AdventureWorks for any flavour of SQL Server from their codeplex site:
http://msftdbprodsamples.codeplex.com/
New project
Fire up DBSourceTools, and select File | New | Project.
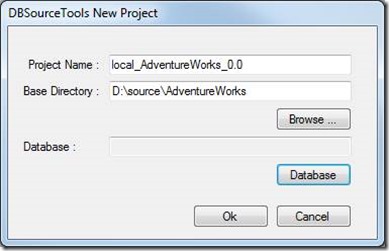
Give the project a name, and point it at a drive on disk. In the screenshot below, we have called our project local_AdventureWorks_0.0, and used d:\source\AdventureWorks as the base directory.
Click on the Database button, and fill in the details on the next form. In this example, we have called the database local_AdventureWorks_0.0, which is the same naming convention that we used in our previous tutorial. This naming convention is serverName_DatabaseName_Version. If you were pointing to a TEST instance of a database, then this servername should match the database server name where the database resides. Using a naming convention makes it clear where the source database originates from:
You can use the Databases button to bring up a list of current databases on the server, and simply pick the correct database. Remember to click on the Test Connection button before the OK button will be enabled. This Test Connection will warn you if you do not have the correct privileges on the server to perform the scripting step. Hit Ok, and then Yes to script the AdventureWorks database.
Once the process has finished, expand the local_AdventureWorks_0.0 icon in DBExplorer to see what database objects were scripted:
Now would be a good time to save the project : File | Save Project. Click on Yes to refresh the data from the database.
Adding a target database
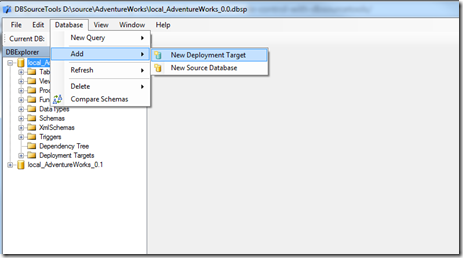
The process of adding a target database is the same as we went through in the first article. Select Database | Add | New Deployment Target from the File Menu.
Fill in the required fields in the New Database Connection screen:
Again note that the Nick Name can be anything, but database NickNames must be UNIQUE across an entire DBSourceTools project. I have stuck to the same naming scheme as we used before for Target Databases: deploy_machineName_DatabasName_Version.
Again note that we can simply type the Database Name in the Database text box at the bottom of the screen – and it is not necessary to click the Databases button or the Test Connection button when creating a Target Database.
Click on OK, and then expand the nodes in DBExplorer to see that the Deployment Target has been created successfully:
Now would be a good time to Save the project. You can safely say No when asked to refresh the data from the database, as we have already done this step previously.
Setting scripting options.
DBSourceTools allows you to have fine-grained control over which database objects are scripted, and included in your deployment. You may just want to script a specific subset of tables, or you may want to script all database tables, but just include data for your “configuration” tables. In this tutorial, we will script all database objects, and all data.
To configure these options, right-click on the local_AdventureWorks_0.0 source database, and select Properties:
This will bring up the Source database properties screen.
This screen includes a set of checkboxes and buttons at the bottom of the page that control which database objects to include in the deployment process.
Including data.
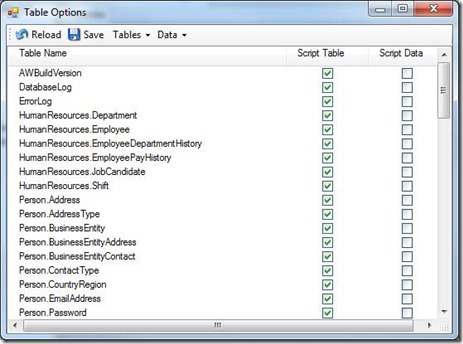
Click on the Tables button to see which tables will be included in the deployment process:
This screen shows all tables within the source database, and has options to script the table, Script the data, or both. Click on the Data dropdown on the menu-bar, and select Script all.
This will enable the Script Data checkboxes for all tables within the database. Hit the Save button to store these scripting options to disk.
Reload
This table options screen has a reload button on the top left. If your source database has changed since the last time you set scripting options – in this case if the list of Tables has changed, then hit the reload button to reload this list from the source database. This ensure that the scripting options stored on disk, and used by the deployment step are in sync with the source database.
This process is similar for Procs, Views and Users, and each screen will allow fine-grained control over which database objects should be used in the deployment step.
Main options
The Source Database properties screen also has checkboxes marked for each of the database object types. Un-checking this “main” checkbox will exclude all objects for that category. Generally, you would want each of these checkboxes to be “on”.
Make sure that the Data checkbox is also “on”, because without this, all of the per-table settings will be ignored.
Once again, after making changes, Save the Project.
Writing Targets
The final step in configuring a source database is to write out our deployment targets. Navigate on the left-hand side to the Deployment Targets node, right-click, and select Write Targets. Select No to refresh data from database.
Each time you write targets, you are given the option of refreshing data from the database. If you would like to refresh the data at any time, then simply Write Targets, and select Yes for DBSourceTools to refresh the data from the source database.
The Write Targets step simply updates the Run_Create_Scripts.bat file based on the database objects found within the source database, and combines this with your scripting options . If you double-click on the Run_Create_Scripts.bat file, you will find that DBSourceTools simply runs sqlcmd to create tables, and then DBSourceDataLoader.exe to load data.
DBSourceDataLoader.exe is optimized to use SQLBulkCopy routines, and can load million record tables in a matter of seconds. The speed of the data loader is only constrained by the speed of your local development machine.
Deploy the target.
Once we have finished the Write Targets step, we can right-click on the deploy_local_AdventureWorks_0.1 Target database, and select Properties. This will bring up the Target Database properties screen:
Simply hit Deploy Target from the menu-bar of this screen.
The Deploy Target is a confirmation screen showing your target database, it’s server, and which batch file DBSourceTools will be using. This is your final chance to cancel a deployment if you hit the button inadvertently. Note that DBSourceTools does a destructive deployment, so it will completely remove the target database, recreate it, and re-deploy the database schema and structure.
Hitting OK here will start the Deployment process:
In the screenshot above, one of the stored procedures is generating an error, and so the output text is coloured in red.
Common deployment errors
One of the most common errors when scripting source databases is caused by having different directory names for the .mdf and .ldf files. If your deployment results screen shows up a lot of red errors, then this is most probably the cause:
On most servers, database files and log files are written to a specific directory, and generally not on the C:\ drive. DBSourceTools uses the SQL Server Management API to generate the CreateDB.sql script when a new source database is created – to ensure that all of the database settings are correct.
To fix this problem, simply navigate to the CreateDB.sql script within the DBExplorer, and double click on the icon. This will open up a new text editor window showing the CreateDB.sql script.
Notice on the second and fourth lines that the script uses a FILENAME parameter which has the physical path to both the .mdf and .ldf files. This full path MUST exist on your local machine. To fix these errors, either create this directory on your local machine, or modify it to the same directory as all of your other .mdf and .ldf files.
Viewing deployment results
Each deployment will create a Deploy_Results_<datetime>.txt file in the deployment target directory. You can always open this text file to view the deployment logs.
Adding the target as a source
As we saw in the first blog on DBSourceTools, you may want to include the newly deployed database as a source database in DBExplorer. This allows you to see both databases side by side, and allows for schema comparisons, data scripting options and much more.
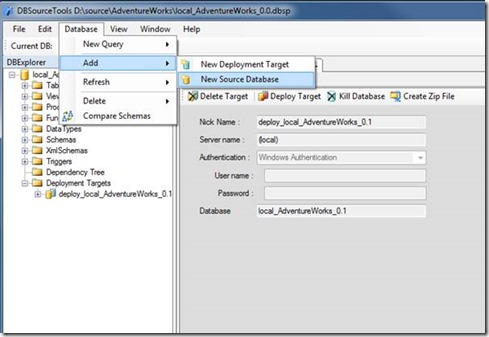
To add the newly created database as a source database, simply click on Database | Add | New Source Database.
Give this new source database a NickName – which is generally machineName_DatabaseName_Version – so in this case local_AdventureWorks_0.1.
Remember that you can click on Databases to bring up a list of the available databases on the machine, and that you must click Test Connection before the Ok button will be enabled. Once you have hit Ok, select Yes to script the new database in DBSourceTools. You should now have both databases showing up in DBExplorer:
Checking the number of records
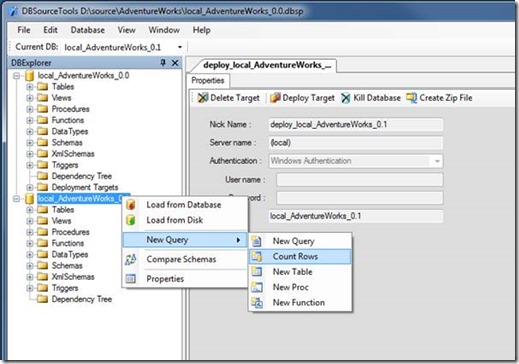
DBSourceTools has a number of built-in script utilities. To generate a sql script that will count the number of records in your database, right-click on the database, select new query and then the Count Rows option.
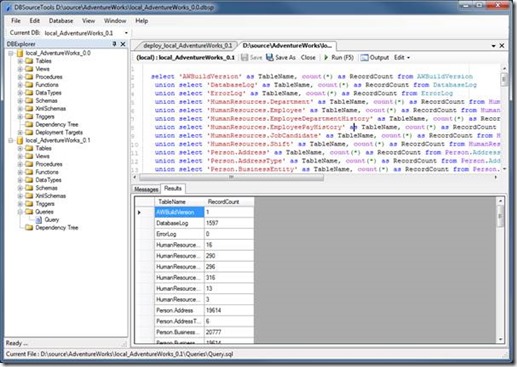
This will generate a script in the Queries directory that simply counts the number of rows in the database. When the query is shown, simply hit F5 to run it.
Summary
In this post, we have shown how to setup a new DBSourceTools project, and how to use an existing database as a source database. We then viewed the source database scripting options, and set options to script data for all tables in the database. We then created a deployment target for this source database, updated the Run_Create_Scripts.bat file by using the Write Targets process, and deployed the database to our local machine.

